
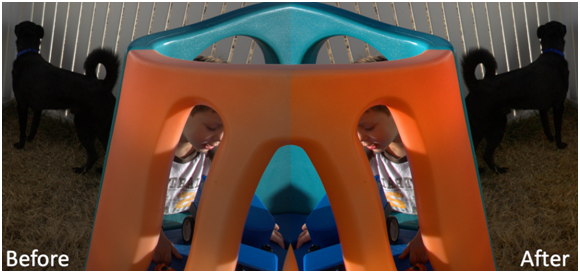
Photoshop’s Camera Raw tool, for importing RAW camera images, provides a really delightful little slider called “vibrance”. Paint Shop Pro does not. I read one post suggesting that vibrance was effectively increasing saturation on low-saturated areas. I decided this would be worth trying to emulate in Paint Shop Pro with some layer magic. The results are shown in the comparison image below. My previous posts show how lifeless this image is right out of the camera. In the comparison, the only difference between before and after is the application of pseudo-vibrance. Skin tones are pretty good, given how much increase in saturation is visible in the toy.
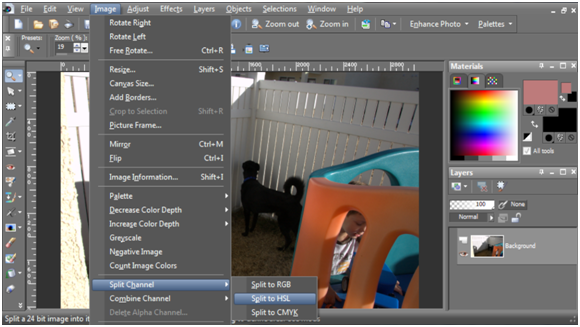
To do this in PSP, open your RAW (or other file). Then split channels to hue, saturation, and lightness, or HSL. Note that PSP can only do an HSL split on images with 8 bits/channel, so it will prompt you to reduce the color depth. Let it, but as soon as it has generated the H, S, L images go back to your original and “undo”—this will restore the original color depth.
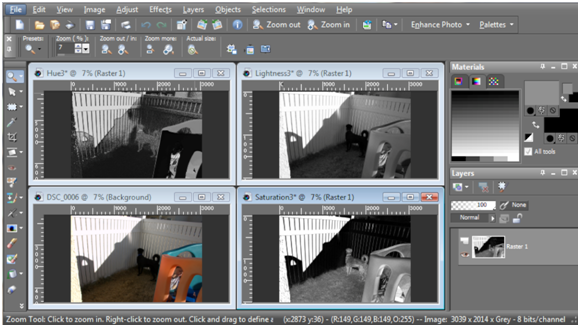
After splitting to channels your screen should look a little like the following. The original is in the subwindow DSC_0006 and the channels are in Hue3, Lightness3, and Saturation3. You can close the Hue and Lightness window—we will only be using the Saturation window.
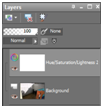
Return focus to the original image. Add a new adjustment layer, with type Hue/Saturation/Lightness. Crank up the saturation to 50 or so—well past the crazy level that you would never, ever, use in a real photo. The effect will be attenuated by adding a mask.
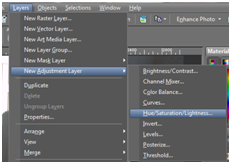
The layers palette will now show the background, and on top of that a Hue/Saturation/Lightness layer.
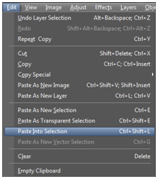
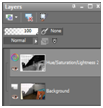
Change window back to the Saturation subwindow, select all, and copy. Jump back to the original window. Select the adjustment layer by clicking on it in the layers palette. Then “Paste Into Selection”, which will embed a mask into the adjustment layer.
You can now see a small black and white image of the saturation channel in the layer thumbnail.
That’s it. Adjust the saturation until it looks good.
Benefits and Drawbacks
Compared to Photoshop, this process is definitely a hassle. I haven’t determined if it can be scripted, but I’m certain there are keyboard shortcuts to speed the process along. There are benefits, though. In Photoshop Elements, once you set the vibrance in the import utility you’re done. If you decide later that you want to tweak the vibrance you have to go back to square one. In PSP you retain the adjustability, at the full 16 bits/channel, and you can layer in other adjustments, like levels. Furthermore, you can change how the effect is applied by adjusting the mask. For example, you can apply curves to the mask layer to change which portions of the picture are affected. I think that kind of adjustment would be fiddly, though.
Final note: I may actually be turning up the saturation on more saturated sections, rather than on less. The effect seems to work however. I did try using the inverse mask, and that may result in pleasing images, though in this case the image looked flatter, not more colorful.